Showing posts with label Windows. Show all posts

Friday, December 27, 2013

Port 80 is already used by another program in windows

This may happens in Windows machines while installing Apache.

This because of the port may be used by some other program like Skype or default os service. To resolve this try the below ways:
  • Disable HTTP.sys driver that was started by some of the Windows inbuilt applications
  • Disable the HTTP in registry under the path "HKEY_LOCAL_MACHINE\SYSTEM\CurrentControlSet\Services\HTTP"


Friday, October 21, 2011

Configured IP v4 settings got resetted at each reboot in Windows vista


Error:
         Windows resets the IP v4 settings what we have configured for our local network (IP, Gateway, DNS server and all) after each restart. This may differs machine to machine like,
  1. Some m/c resets the gateway only.
  2. Some m/c resets the entire settings (IP, Gateway, DNS).
Reason:
          Moment after updating the security patches from microsoft, Windows (Vista/7 or later) machines got updated with new things that is provided by the respective vendor. Likewise, NIC (network interface card) driver also got updated during that. This is the problem in my case. 

Solution:
          For that, you can uninstall the driver which is newly updated along with the security patches from Microsoft to get the rid of it.
To do that,
  1. Go to device manager. (press Win+Break and then select device manager)
  2. In that, Under Network adapters, right click the device listed and click uninstall.
  3. Then select the 'Scan for hardware changes' from action menu. This will shows the net work device once and tries to install basic driver available. Leave as it is.
  4. Now its finished the installation with basic driver. This will works fine.


Note : This is tested under Windows vista.

Monday, September 12, 2011

Installing of Windows7 using USB / Pen drive like Linux

Instead of writing the Windows 7 ISO image into DVD to install, you can use the pen drive to install like the procedure followed to install Ubuntu using Live CD.


Here are the stpes...


1.  Download Windows 7 ISO image

      Place the file Desktop or somewhere in your machine.

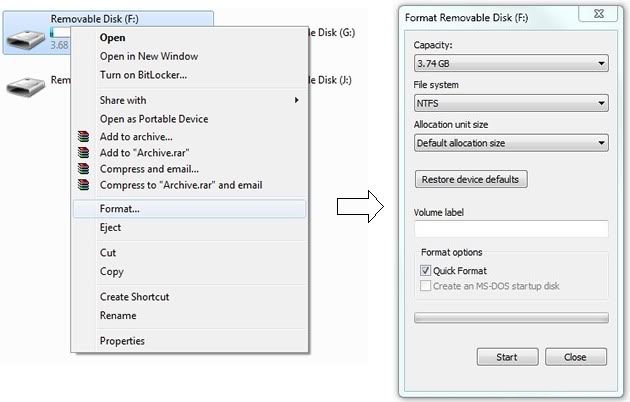
2.  Format a USB Pen drive

     To do that, right click the drive and select 'Format...' from the menu.

3.  Extract the Windows 7 ISO file
 

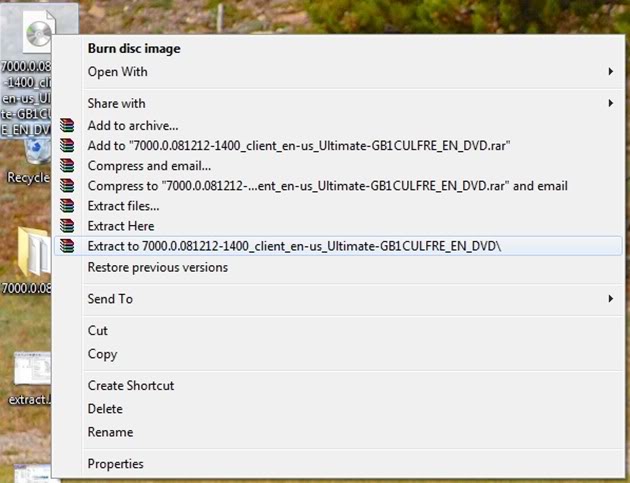
    Use WinRAR or 7zip tool to extract the image and save it somewhere (or Desktop itself).


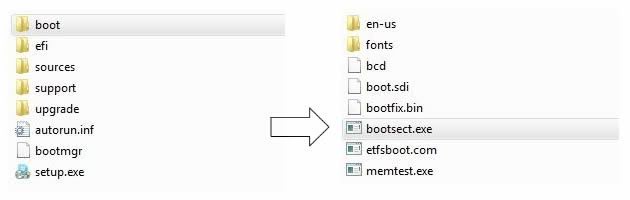
4.  Copy BootSect.exe file


     Copy the "bootsect.exe" file to C: for ease access.


5.  Make the Drive Bootable
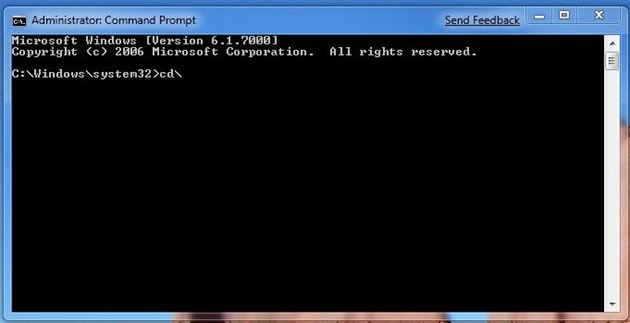
     Go to Start => Programs => Accessories and then right-click on Command Prompt and choose “Run as administrator.”  menu.


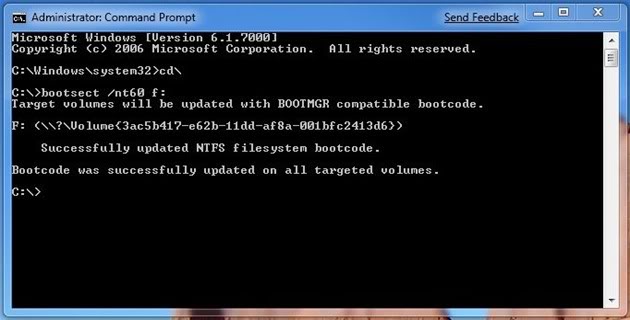
 In console, type and enter the followings:

    1. cd\
    2. bootsect /nt60 f:

    In above,  f: denotes the drive letter of our Pen Drive. This may differ. So replace that with whatever is assigned in your system.


    Now the Pendrive is ready to auto load when reboot.

6.  Copy the Windows 7 files to the thumb/Pen drive
     Copy all the files of Windows 7 folder to the USB Pen drive.

     Change the boot order by selecting your Pen drive as a first device to boot in BIOS.

     Reboot the computer.You can be able to install Windows 7 from your USB flash drive now on.


Windows XP installation time reducing trick


Normally Windows XP installation takes around 40 minutes to complete, but through this trick you can now save 10-15 minutes.


Trick:


  1. Boot through Windows XP CD.
  2. After all the files are completely loaded, you get the option to select the partition. Select “c”.
  3. Now Format the partition, whether it is normal or quick with NTFS or FAT
  4. Once the formatting is completed, All the setup files required for installation are copied. Restart your system by pressing Enter.

    Now, here begins the Simple trick to save 10-15 minutes.
  5. After rebooting, you get a screen where it takes 40 minutes to complete or finalize the OS installation.
  6. Now, Press SHIFT + F10 Key -> This opens command prompt.
  7. Enter “Taskmgr” at the command prompt window. This will open Task Manager.
  8. Click the Process Tab, here we find a process called Setup.exe -> Right Click on Setup.exe -> Set Priority -> Select High or Above Normal. Initially it will be Normal.


That's it. This will fasten the installation process as much as your system can do. This may vary depends upon the system hardware. But assured is, it will save lot time compare to normal installation.

Tuesday, June 14, 2011